Starting an online store has never been easier, and if you’re reading this, you’re probably wondering how to build a Shopify store from scratch that actually makes sales. Whether you’re launching your first business or moving from a brick-and-mortar shop to online selling, this complete Shopify store setup guide will walk you through every single step.
By the end of this tutorial, you’ll have a fully functional Shopify store ready to accept orders. Let’s dive in.
Why Choose Shopify for Your Online Store?

Before we jump into the Shopify beginner tutorial, let’s quickly understand why millions of businesses trust Shopify.
Shopify powers over 4.5 million active stores worldwide and has contributed to more than $1.1 trillion in sales. Major brands like Gymshark, Netflix’s online shop, Red Bull, and Heinz all run on Shopify. Here’s why it’s the top choice:
- Easy to use – No coding skills required
- Reliable hosting – Your store stays online 24/7
- Secure payments – Built-in payment processing
- Mobile-friendly – All themes work perfectly on phones
- Scalable – Grows with your business from first sale to millions
- 24/7 support – Help available whenever you need it
With 63% of global consumers now purchasing directly from brand websites, building your Shopify store is a smart investment in your business’s future.
What You Need Before Starting?
Before you create a Shopify store step by step, gather these essentials:
Basic Requirements:
- Valid email address.
- Payment method for the trial (credit/debit card).
- Computer or laptop with good internet connection.
- Clear business idea or products to sell.
Business Essentials (recommended):
- Business name (can be changed later).
- Product photos or descriptions.
- Basic understanding of your target audience.
- Bank account for receiving payments.
Don’t worry if you don’t have everything figured out yet. Shopify’s free trial gives you time to build and test before launching.
Step 1: Sign Up for Your Shopify Account
This is where your journey begins. Here’s how to create your Shopify account:
- Visit Shopify’s website at shopify.com
- Click “Start free trial” on the homepage
- Enter your email address – Use one you check regularly
- Create a strong password – Mix letters, numbers, and symbols
- Choose your store name – This creates your temporary web address
Your store name will become part of your default URL (yourstorename.myshopify.com). Don’t stress too much about this – you can connect a custom domain later.
The Good News About Pricing
Shopify offers a 3-day free trial, and after that, you can get your first 3 months for just $1 per month. This gives you plenty of time to set up and start selling before committing to the full price.
Shopify pricing in 2026:
- Basic Plan: $29/month (billed annually) or $39/month (monthly billing)
- Grow Plan: $79/month (billed annually) or $105/month (monthly billing)
- Advanced Plan: $299/month (billed annually) or $399/month (monthly billing)
Pro tip: Choose annual billing to save 25% on your subscription costs.
For most beginners, the Basic plan has everything you need to launch successfully.
Step 2: Answer the Quick Setup Questions
After creating your account, Shopify will ask a few quick questions:
- Are you already selling?
- What will you sell?
- What’s your current revenue (if any)?
- Why are you starting this store?
Should you skip these questions?
While you can skip them, I recommend answering honestly. Your responses help Shopify customize your dashboard and suggest relevant tools, saving you setup time later.
Once completed, you’ll land in your Shopify admin dashboard – your store’s control center.
Step 3: Get Familiar with Your Shopify Dashboard
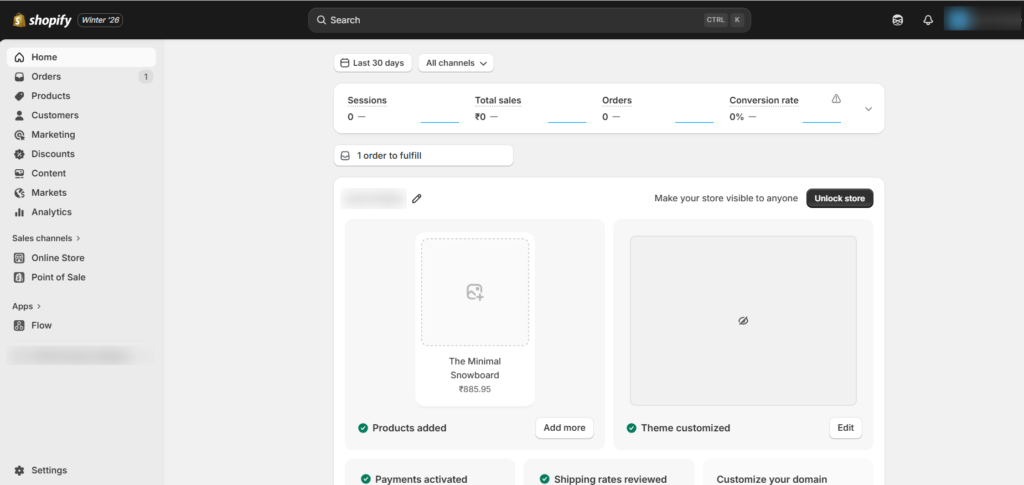
The Shopify admin panel might look overwhelming at first, but it’s actually quite intuitive. Here’s what each section does:
Main Dashboard Sections:
Home – Shows live visitor stats, sales data, and setup tasks
Orders – Manage all customer orders and fulfillment Products – Add and organize your inventory
Customers – View customer information and purchase history
Analytics – Track store performance and sales metrics
Marketing – Create campaigns and view marketing performance
Discounts – Set up promotional codes and special offers
Online Store – Customize your store design and pages
Settings – Configure payments, shipping, taxes, and more
Take 10 minutes to click through each section. Familiarity with the dashboard will make the setup process much smoother.
Step 4: Choose Your Shopify Theme
Your theme controls how your store looks to customers. First impressions matter, so choosing the right theme is crucial.
How to Select a Theme:
- Go to Online Store > Themes in your dashboard
- Click “Add theme” then “Visit theme store“
- Browse the available themes
📢 Important: Shopify offers both free and paid themes. The free themes are actually excellent quality and used by many successful stores.
Horizon Themes (New in 2026)
Shopify’s newest theme collection, Horizon, launched in 2025 and represents a major upgrade. These themes are:
- Completely free
- AI-powered with block generation
- Fully mobile-optimized
- Easy to customize with drag-and-drop
- Fast-loading for better SEO
Our recommendation for beginners: Start with the base Horizon theme or Dawn theme (free). These work for almost any product category and are incredibly flexible.
Popular Free Themes:
- Dawn – Clean, versatile, fast
- Sense – Great for larger catalogs
- Studio – Modern, image-focused
- Craft – Perfect for artisan products
Paid themes range from $140-$450 but aren’t necessary when starting out. You can always upgrade later.
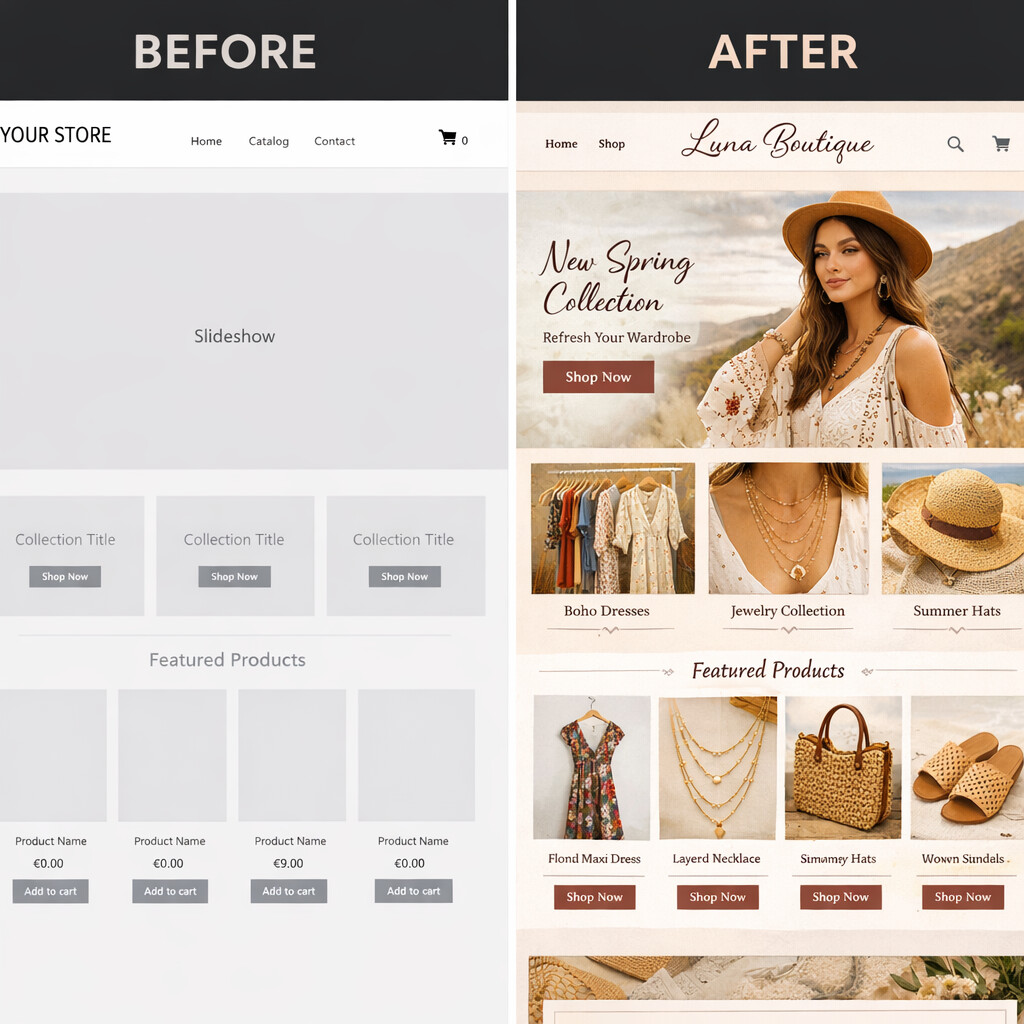
Step 5: Customize Your Store Design
Now comes the fun part – making your store unique.
Basic Customization Steps:
- From your theme library, click “Customize” on your active theme
- You’ll open the theme editor with a live preview
What You Can Customize:
Header:
- Add your logo
- Create navigation menus
- Add announcement bar for promotions
Homepage:
- Hero image or video
- Featured products
- Collection highlights
- About section
- Testimonials
Footer:
- Contact information
- Social media links
- Legal pages links
- Newsletter signup
Colors & Fonts:
- Brand colors throughout
- Font styles (headings and body text)
- Button colors and styles
💡 Pro tip: Keep your design clean and simple. Too many colors or fonts can confuse visitors and hurt sales.
Use AI to Speed Things Up (2026 Feature)
Shopify’s new AI assistant, Sidekick, can help you customize your store. Just click the purple glasses icon in your dashboard and ask questions like:
- “How do I change my header color?”
- “Add a featured collection to my homepage”
- “Create an announcement bar with a discount code”
Sidekick will guide you through the process or even make changes for you.
Step 6: Add Your Products
Your products are the heart of your store. Here’s how to add them properly for maximum sales.
Adding Your First Product:
- Click “Products” in the left menu
- Select “Add product”
- Fill in the product details
Product Information Checklist:
Title
- Clear and descriptive
- Include key search terms
- Example: “Men’s Waterproof Hiking Boots – Brown Leather”
Description
- Explain benefits, not just features
- Include size guides or specifications
- Answer common questions
- Use bullet points for readability
Images
- High-quality photos (minimum 2000 x 2000 pixels)
- Multiple angles
- Show product in use
- White background for main image
- Lifestyle shots for context
Pricing
- Compare at price (if applicable)
- Sale price (original price)
- Profit margin calculation
Inventory
- SKU (stock keeping unit)
- Quantity available
- Track inventory option (checkbox)
Shipping
- Weight (for shipping calculations)
- Physical product checkbox
Organization
- Product type
- Vendor
- Collections (categories)
- Tags for filtering
SEO Section
- Custom page title
- Meta description (155 characters)
- URL handle
Creating Collections
Collections help customers browse related products. To create collections:
- Go to Products > Collections
- Click “Create collection”
- Name your collection (e.g., “Summer Dresses” or “Best Sellers”)
- Add a description
- Add products manually or set automatic conditions
Step 7: Create Essential Store Pages
Beyond your homepage and product pages, you need several important pages for credibility and legal compliance.
Required Pages:
About Us
- Your brand story
- Mission and values
- Why you started
- Team photos (optional)
Contact Us
- Contact form
- Email address
- Phone number (if available)
- Physical address
- Business hours
Shipping & Returns
- Shipping costs and timeframes
- Return policy (timeframe, conditions)
- Exchange process
- Refund policy
Privacy Policy
- How you collect data
- What data you collect
- How you use customer information
- (Shopify can generate this automatically)
Terms of Service
- Purchase conditions
- User responsibilities
- Limitation of liability
- (Shopify can generate this automatically)
FAQ
- Common questions about products
- Ordering process
- Payment methods
- Shipping questions
- Return questions
How to Create Pages:
- Go to Online Store > Pages
- Click “Add page”
- Enter title and content
- Click “Save”
💡 Pro tip: Use Shopify’s policy generators for Privacy Policy and Terms of Service. Go to Settings > Policies and click “Create from template.”
Step 8: Set Up Your Store Navigation
Help customers find what they’re looking for by creating a clear menu structure.
Creating Your Main Menu:
- Go to Online Store > Navigation
- Click “Main menu”
- Add menu items:
- Shop (link to collections)
- About
- Contact
- FAQ
Menu Best Practices:
- Keep it simple (5-7 main items maximum)
- Use clear, descriptive labels
- Add dropdown menus for collections
- Include link to Contact page
- Add search functionality
You can also create a footer menu with:
- Legal pages (Privacy, Terms)
- Customer service links
- Social media
- Newsletter signup
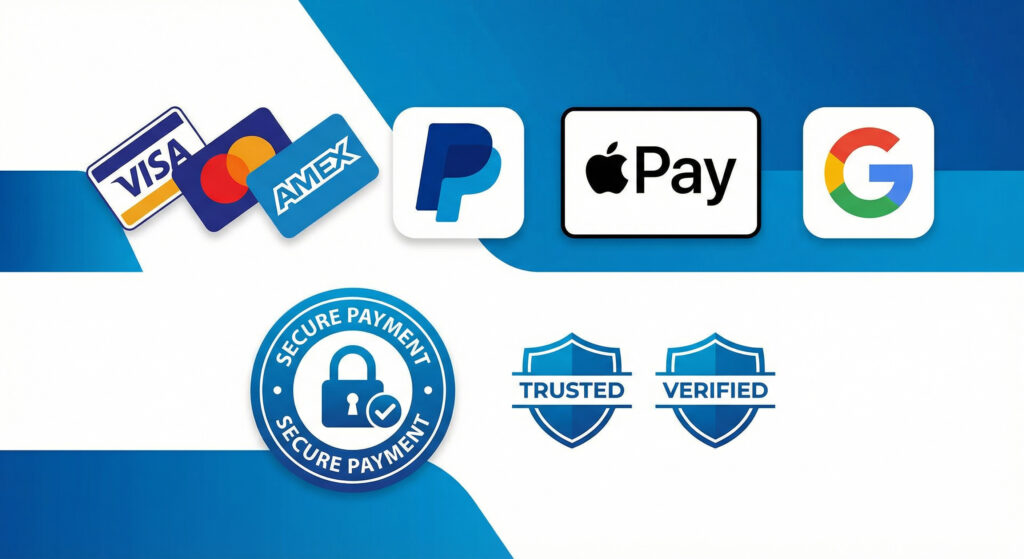
Step 9: Configure Payment Settings
Time to set up how you’ll get paid. This is crucial for receiving money from sales.
Activating Shopify Payments:
Shopify Payments is the easiest option – no third-party setup needed.
Steps:
- Go to Settings > Payments
- Click “Activate Shopify Payments”
- Confirm your choice
- Complete the setup process:
- Select business type
- Enter bank account details
- Provide tax information (if required)
- Enable two-factor authentication
Shopify Payments rates (2026):
Plan | Online Card Rate |
Basic | 2.9% + $0.30 USD |
Grow | 2.7% + $0.30 USD |
Advanced | 2.5% + $0.30 USD |
Benefits of Shopify Payments:
- No transaction fees (other plans charge 2% extra)
- Faster payouts
- Integrated with your dashboard
- Accept all major credit cards
- Apple Pay and Google Pay included
Alternative Payment Methods:
You can also enable:
Note: Using third-party payment processors means additional transaction fees on top of credit card fees.
Payment Method Recommendations:
Enable multiple options to reduce abandoned carts:
- Credit/debit cards (via Shopify Payments)
- PayPal
- Apple Pay
- Google Pay
- Shop Pay (Shopify’s accelerated checkout)
Step 10: Configure Shipping Settings
Shipping can make or break a sale. Set it up correctly from the start.
Basic Shipping Setup:
- Go to Settings > Shipping and delivery
- Click “Manage rates”
- Set up shipping zones
Shipping Zone Examples:
Domestic Shipping (Your Country)
- Free shipping over $50
- Standard shipping: $5.95
- Express shipping: $12.95
International Shipping
- Flat rate: $15.00
- Or calculated rates based on weight
Shipping Best Practices:
(1) Offer free shipping when possible – Even if you build it into product prices, customers prefer seeing “Free Shipping”
(2) Be clear about delivery times – Set realistic expectations (5-7 business days)
(3) Provide tracking – Shopify automatically sends tracking info to customers
(4) Consider flat rate shipping – Simpler for customers to understand.
Weight-Based Shipping:
For accurate shipping costs:
- Enter product weights in product settings
- Connect to carrier accounts (USPS, FedEx, UPS)
- Enable calculated shipping rates at checkout
Shopify provides discounted shipping rates:
- Basic plan: Up to 77% off
- Grow plan: Up to 88% off
- Advanced plan: Up to 88% off
Step 11: Set Up Tax Collection
Taxes aren’t exciting, but they’re essential. Shopify makes this relatively painless.
Automatic Tax Setup:
Good news: Shopify automatically configures tax rates based on your store location.
What to do:
- Go to Settings > Taxes and duties
- Review pre-filled tax settings
- Confirm they match your region’s requirements
- Add additional tax regions if selling internationally
US Sellers:
Shopify can automatically calculate sales tax for all 50 states. You may need to:
- Register for sales tax permits in states where you have nexus
- Enable tax collection for those states
- File regular tax returns
International Sellers:
- VAT (Europe): Shopify handles VAT calculations
- GST (Canada, Australia): Automatic calculation available
- Duties: Choose whether to include in price or charge separately
💡 Pro tip: Consult a tax professional about your specific obligations. Shopify provides the tools, but you’re responsible for compliance.
Step 12: Connect Your Custom Domain
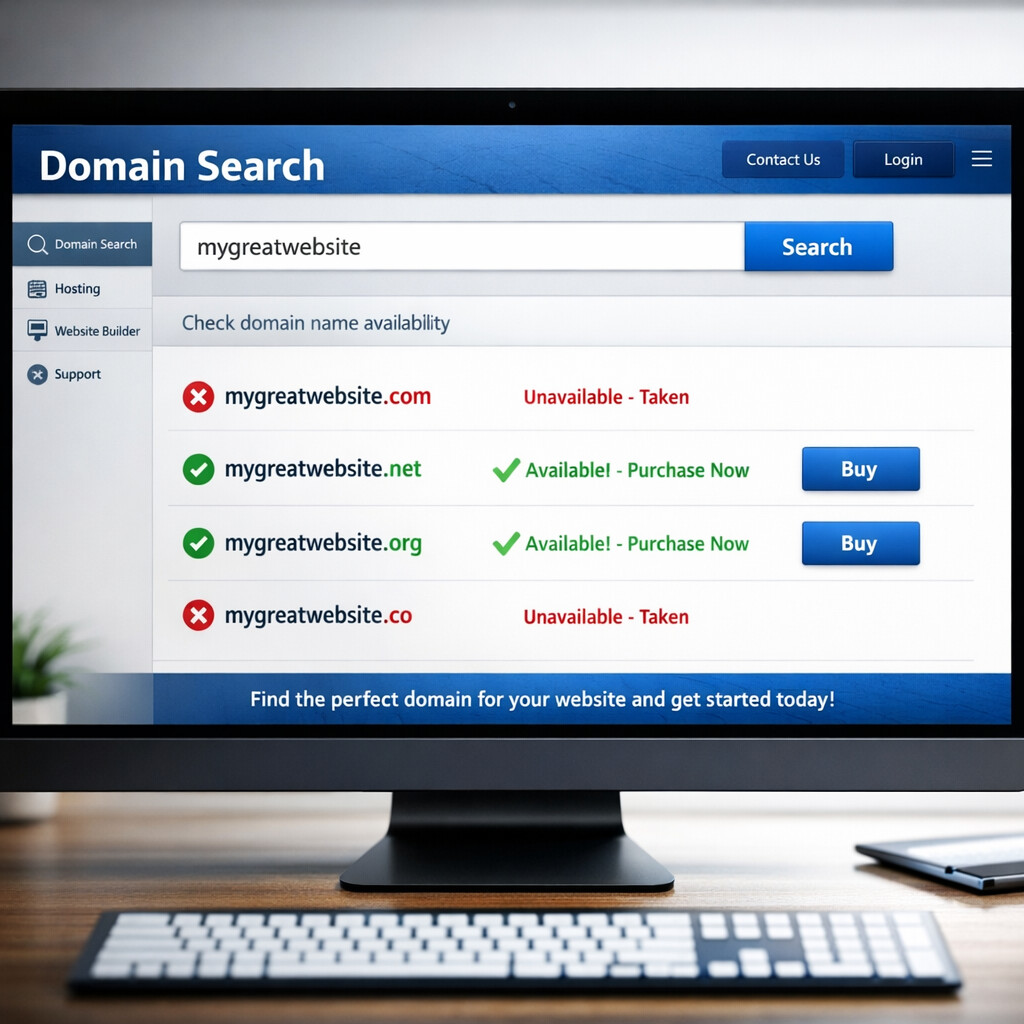
Your myshopify.com subdomain works, but a custom domain looks more professional and trustworthy.
Two Options:
Option 1: Buy a domain through Shopify
- Go to Settings > Domains
- Click “Buy new domain”
- Search for available names
- Complete purchase ($11-14/year)
- Shopify automatically connects it
Option 2: Connect an existing domain
- Go to Settings > Domains
- Click “Connect existing domain”
- Enter your domain name
- Follow DNS setup instructions
- Update settings at your domain provider (GoDaddy, Namecheap, etc.)
Choosing a Domain Name:
Good domain names are:
- Short and memorable
- Easy to spell
- Relevant to your products
- Ends in .com (preferred) or .shop
Avoid:
- Numbers or hyphens
- Copyrighted names
- Hard-to-spell words
Step 13: Install Essential Apps
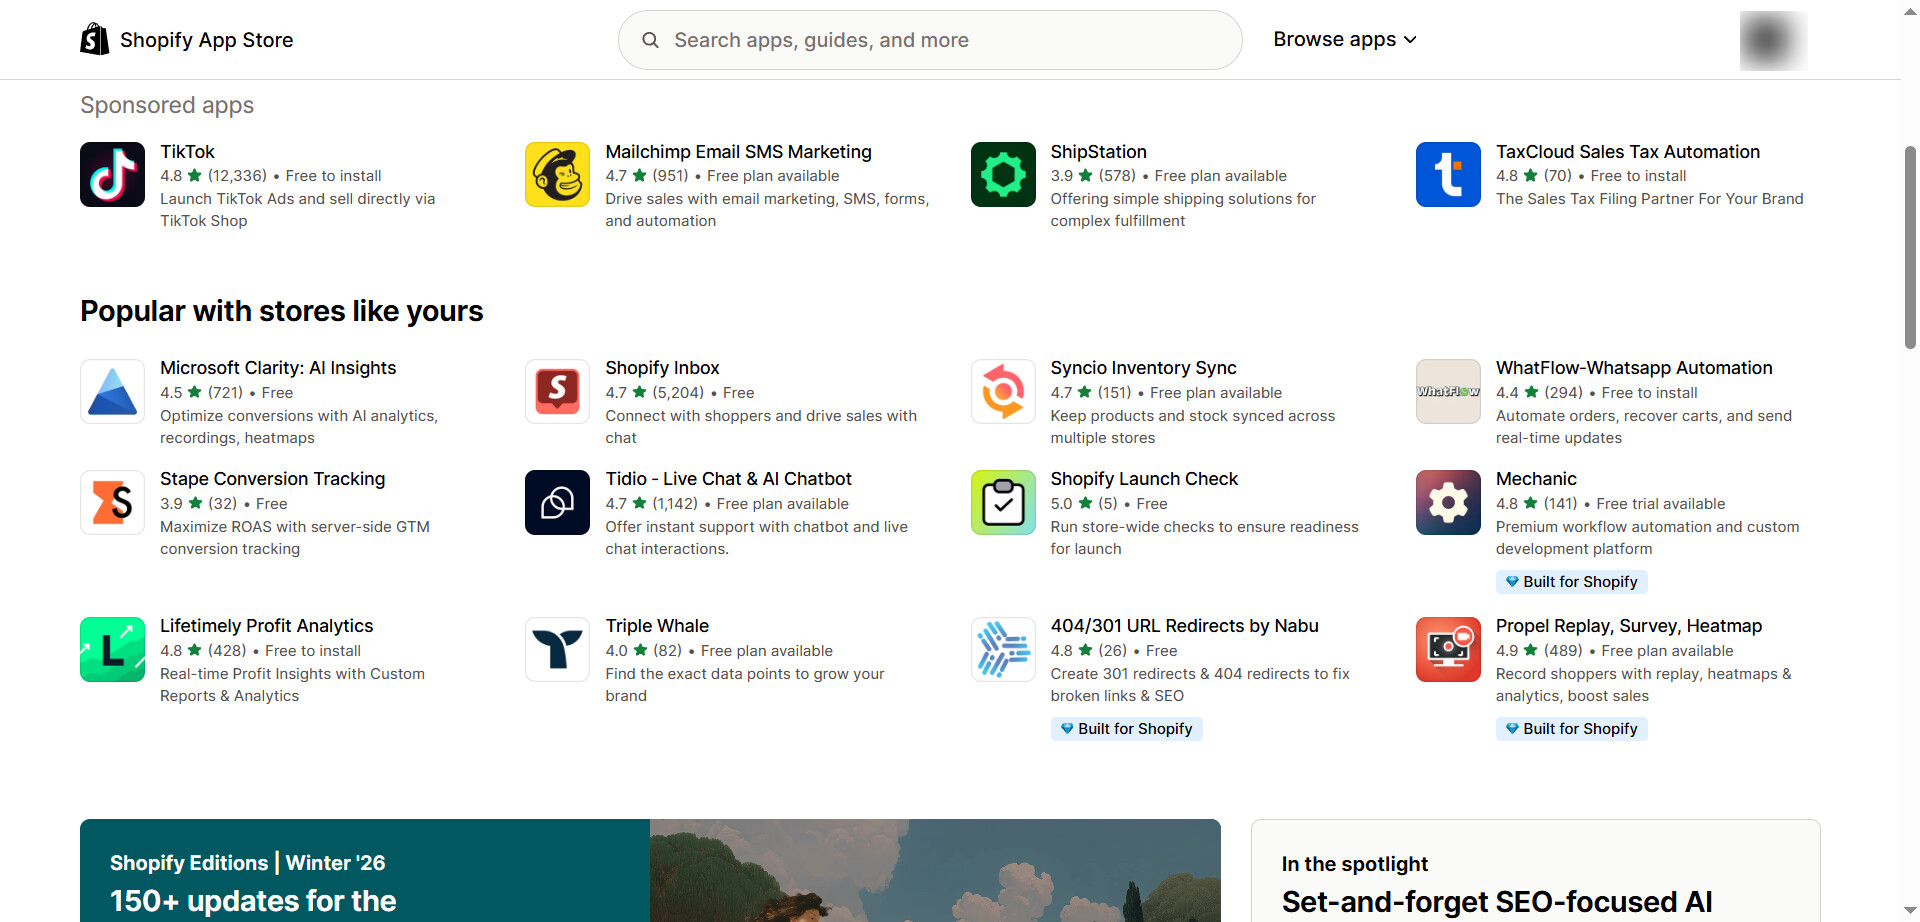
Apps extend your store’s functionality. Here are must-have apps for beginners:
Recommended Apps:
For Reviews:
- Judge.me (free plan available)
- Loox (photo reviews)
For Email Marketing:
- Klaviyo (powerful automation)
- Omnisend (beginner-friendly)
For SEO:
- SEO Manager (free trial)
- TinyIMG (image optimization)
For Customer Service:
- Tawk.to (free)
- Tidio (live chat)
- Gorgias (helpdesk)
For Upselling:
- ReConvert (post-purchase upsells)
- Ultimate Special Offers (bundle deals)
For Social Proof:
- Sales Pop (recent purchase notifications)
- Fomo (activity popup)
How to Install Apps:
- Go to Apps in your dashboard
- Click “Customize your store”
- Browse the Shopify App Store
- Search for specific apps
- Click “Add app”
- Follow installation instructions
⚠️ Warning: Don’t install too many apps initially. Start with 3-5 essential ones. Too many apps can slow your store and increase costs.
Step 14: Place a Test Order
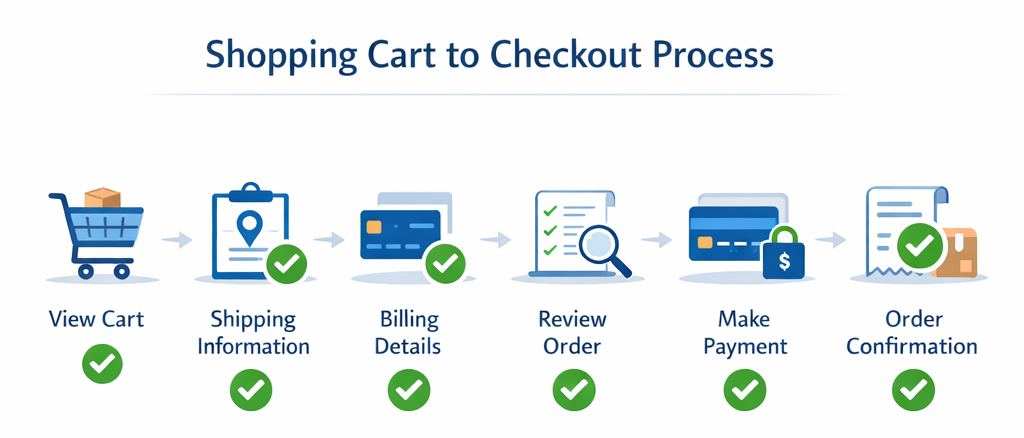
Before launching, test your entire customer experience.
How to Test Payment Method:
Enable Test Mode:
- Go to Settings > Payments
- For Shopify Payments, enable test mode
- Or use Shopify’s “Bogus Gateway” for testing
Place Your Order:
- Visit your store (click “View your store” button)
- Add products to cart
- Go through checkout process
- Use test credit card: 1 for Visa, 2 for Mastercard
- Complete the order
What to Check:
- Product pages display correctly
- Add to cart button works
- Cart updates properly
- Checkout process is smooth
- Payment processes (in test mode)
- Confirmation email arrives
- Order appears in admin dashboard
- Shipping calculations are correct
- Tax calculations are accurate
Fix any issues before launching!
Step 15: Optimize for SEO
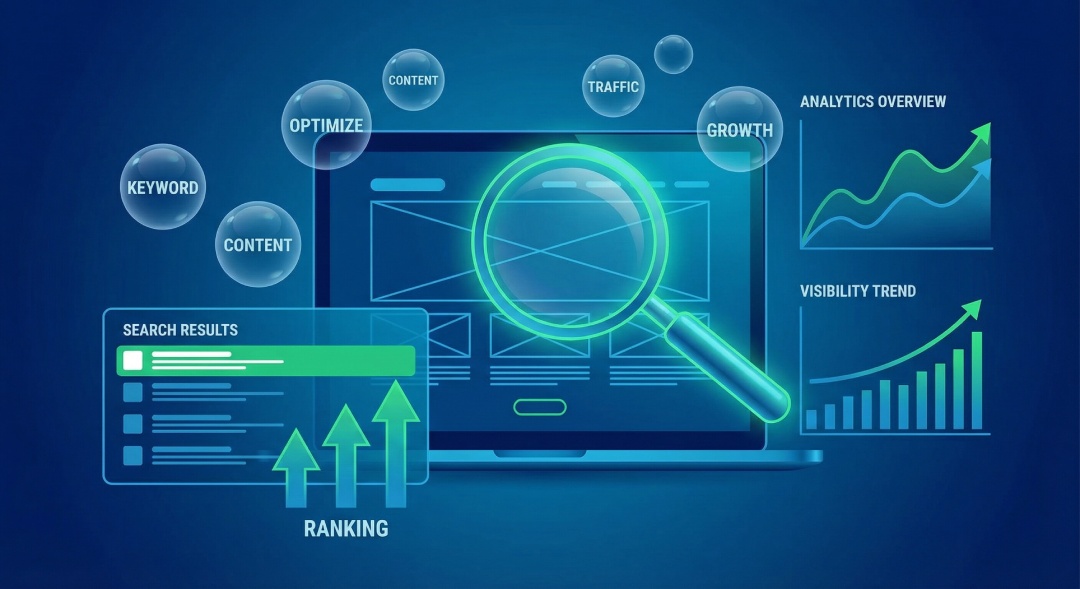
Search engine optimization helps customers find your store on Google.
Basic SEO Checklist:
Store Settings:
- Go to Settings > General
- Add store description (150 characters)
- Add homepage title
Product SEO:
- Write unique product titles
- Create detailed descriptions (300+ words)
- Add meta descriptions
- Use descriptive image alt text
- Include relevant keywords naturally
Collection SEO:
- Write unique collection descriptions
- Add keywords in collection titles
- Create meta descriptions
Blog Content:
- Start a blog under Online Store > Blog posts
- Write helpful content for your audience
- Use keywords naturally
- Link to your products
Technical SEO:
- Ensure site speed is fast (Shopify handles this mostly)
- Mobile-friendly design (all themes are responsive)
- SSL certificate (included with Shopify)
- Sitemap automatically generated
💡 Pro tip: Don’t stuff keywords. Write naturally for humans first, search engines second.
Step 16: Remove Password Protection and Launch
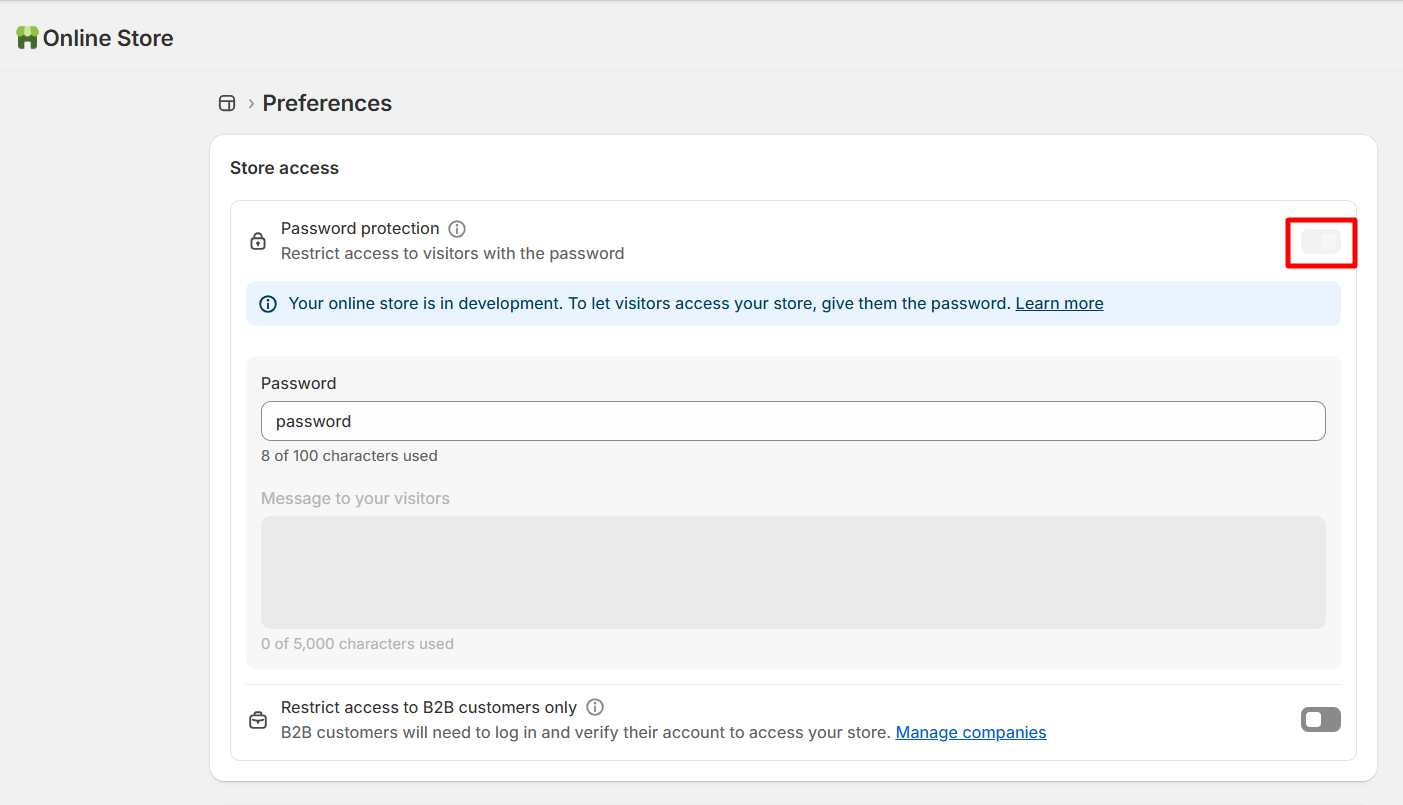
By default, your store is password-protected during setup. Time to remove it and go live!
Launching Your Store:
Method 1: Through Setup Guide
- Complete all setup tasks in your home dashboard
- Shopify will prompt you to remove password
- Click “Remove password” when ready
Method 2: Through Settings
- Go to Online Store > Preferences
- Scroll to “Password protection” section
- Uncheck “Restrict access”
- Click “Save”
Before launching, verify:
- All products are added with images
- Prices are correct
- Shipping rates are configured
- Payment methods work (tested)
- Legal pages are published
- About and Contact pages complete
- Domain is connected
- Store looks good on mobile
Congratulations! Your store is now live and accessible to everyone.
Step 17: Set Up Your First Marketing
You’ve built your store, now let’s get customers.
Immediate Marketing Actions:
- Social Media Setup
- Create business accounts (Instagram, Facebook, TikTok)
- Add your store link to bio
- Post product photos
- Use relevant hashtags
- Engage with potential customers
- Email Marketing
- Install email app (Klaviyo or Omnisend)
- Create welcome email series
- Offer first-purchase discount (10-15% off)
- Collect emails with popup
- Friends & Family Launch
- Share with your network first
- Request honest feedback
- Ask for reviews
- Offer launch discount
- Content Marketing
- Write blog posts
- Create helpful content
- Answer customer questions
- Share on social media
- Paid Advertising (Optional)
- Start small ($10-20/day)
- Test Facebook or Instagram ads
- Use retargeting for visitors
- Monitor ROI closely
First Sale Checklist:
When you make your first sale:
- Celebrate! You did it!
- Send a thank you note
- Process order quickly
- Provide tracking information
- Follow up after delivery
- Request review
Common Shopify Mistakes to Avoid
Learn from others mistakes:
- Poor Product Photos
❌ Mistake: Using low-quality or stock photos Solution: Invest in good product photography or hire a photographer
- Complicated Navigation
❌ Mistake: Too many menu items or confusing categories Solution: Keep menus simple with 5-7 main items
- Missing Policies
❌ Mistake: No return policy or shipping information Solution: Create clear policies before launching
- No Social Proof
❌ Mistake: No reviews or testimonials Solution: Collect reviews from first customers
- Slow Loading Times
❌ Mistake: Too many apps or unoptimized images Solution: Compress images and limit apps to essentials
- Poor Mobile Experience
❌ Mistake: Not testing on mobile devices Solution: Always preview and test on phone
- Unclear Shipping Costs
❌ Mistake: Hiding shipping costs until checkout Solution: Show shipping info clearly on product pages
- No Email Capture
❌ Mistake: Not collecting emails Solution: Add email popup with discount offer
- Weak Product Descriptions
❌ Mistake: Copy-paste manufacturer descriptions Solution: Write unique, benefit-focused descriptions
- Giving Up Too Early
❌ Mistake: Expecting instant sales Solution: Be patient, test, optimize, and keep marketing
Shopify Store Costs Breakdown (2026)
Let’s talk about the real costs of running a Shopify store:
Monthly Recurring Costs:
Shopify Subscription: $29-$399/month
- Basic: $29/month (annual) or $39/month (monthly)
- Most beginners start here
Apps: $0-$200+/month
- Many free options available $0
- Budget $20-50/month for quality apps initially
Email Marketing: $0-$50/month
- Free plans available for small lists $0
- Paid plans start around $20/month
Domain: $11-14/year
- One-time annual cost
- Some registrars charge more
One-Time Costs:
Theme: $0-$450
- Start with free theme
- Upgrade later if needed
Logo Design: $0-$500
- DIY with Canva (free) $0
- Professional designer ($100-500)
Product Photography: $0-$1000+
- DIY with smartphone $0
- Professional photoshoot ($500-1000)
Initial Inventory: Varies
- Dropshipping: $0
- Small inventory: $500-2000
- Large inventory: $5000+
Transaction Costs:
Credit Card Fees: 2.5-2.9% + $0.30
- Lower percentage on higher plans
- No additional fees with Shopify Payments
Total First Year Estimate:
- Minimum: $500-1000 (bare essentials, free theme, dropshipping)
- Realistic: $1500-3000 (quality apps, good theme, inventory)
- Premium: $5000+ (professional everything)
💡 Pro tip: Start lean. You can always upgrade as you grow and generate revenue.
Next Steps After Launch
Your store is live, what now?
Week 1:
- Monitor orders daily
- Respond to customer questions quickly
- Share on social media
- Ask friends for feedback
- Fix any issues immediately
Month 1:
- Analyze traffic in Shopify Analytics or Google Analytics
- Test different product photos
- Write blog posts
- Collect customer reviews
- Optimize product pages based on data
Month 2-3:
- Start email marketing campaigns
- Experiment with paid ads
- Add new products
- Create special offers
- Build social media following
Month 4-6:
- Analyze best-selling products
- Improve underperforming pages
- Expand marketing channels
- Consider upgrading plan if needed
- Scale what’s working
Long-term:
- Build email list consistently
- Create loyal customer base
- Expand product line
- Test new markets
- Optimize for profitability
Frequently Asked Questions
How long does it take to set up a Shopify store?
Do I need coding skills to build a Shopify store?
Can I build a Shopify store on my phone?
How much money do I need to start?
Can I change my theme after launching?
Do I need a business license?
How do I get my first customers?
What products sell best on Shopify?
Can I sell internationally?
What if I have technical problems?
What if I have technical problems?
Final Thoughts
Building a Shopify store from scratch might seem overwhelming at first, but by following this step-by-step guide, you now have everything needed to launch successfully.
Remember:
- Start simple and improve as you go
- Test everything before launching
- Focus on your customers’ experience
- Be patient – success takes time
- Keep learning and optimizing
The most important step is actually starting. Thousands of successful Shopify store owners began exactly where you are right now. The difference? They took action.
Your journey to ecommerce success starts today. Follow these steps, stay consistent with marketing, provide excellent customer service, and you’ll be well on your way to building a profitable online business.
Ready to start? Head over to Shopify.com and begin your free trial now!


